Sunday, November 20, 2011

Two Ingredients..

Saurkraut.

If you don't like it - I can't help you. If you enjoy pungent, home made, lacto-fermented natural foods, you have come to the right place!

Step 1) Thinly slice organic cabbage into shreds

Step 2) Salt and smash cabbage. Bruise it up nicely. Mortar and pestle works, or just your fists in a big clean bowl.

Step 3) Press into a food grade container. The salt should draw enough liquid out to cover the cabbage. Obviously - I used a canning jar. Because canning jars are my answer to almost everything.


Step 4) Cover and weight down the future kraut. I used a plastic lid cut to size, and a smaller jar of water. If there isn't enough water for an inch of brine, add some boiled and cooled salt water to keep this covered. The salt water is like a protective layer to protect your krauty goodness.


The fresh, green, unfermented jar
Step 5) Cover with cheesecloth and let ferment. Yes. On the counter.

Step 6) Taste. When ready refrigerate to slow fermentation.

Step 7) Remember to use clean, non-reactive utensils to retrive the sauerkraut. This can be a plastic or wooden spoon, I like chopsticks because my jar is deep.

If you want to continue, salt and smash some fresh cabbage, empty your jar and add the new cabbage to the bottom.

Finished: my sauerkraut hanging out in the fridge. Afterthought - perhaps I should have cleaned my fridge.


Usual Disclaimer: if you do this wrong you may make yourself ill. Lacto-fermented foods done wrong mean either the yeast or bacteria takes over the other.. I just happen to be the owner of a steel stomach, and friendly bacterial environment in my house. Also I am crazy neurotic about using only clean, sanitized, non metallic tools for this.


It gets better tasting the long it sits, and looses more and more color.

Justify the purchase of totally unhealthy perogies and gobble. Also enjoyed on smash up of day old boiled potatoes, onion and a bit of bacon left over from breakfast.

 Enjoy!

Wednesday, November 16, 2011

Autumn Chutney


SO many pears and delicious squashy things around at this time of the year...

I was inspired by a recipe posted by a local produce merchant I subscribe to. There was a recipe for a Pear Chutney.... After some googling and a trip to the grocery store I was prepared.


In the pot went:


3 lbs of Pears with skins on, cubed

2 cups of apple cider vinegar

*my family loves vinegar-y foods, more than is good for us. You can cut this down a bit but please keep in mind if you plan on canning or processing this chutney acidity is what will keep it microbe free!

1 1/2 C brown sugar, plus a healthy squeeze of honey.
* the recipe called for 2 cups of brown sugar, but again, honey is naturally antibacterial, and I ran out of sugar.

a big handful of GOLDEN raisins
*will make the chutney, get some of these instead of dark ones while you are in the bulk section buying the....


candied ginger. Again, the recipe called for 1/4 cup. I eyeballed this as about 8 or 9 chunks. minced up really small

half a large, stinky yellow cooking onion that made me cry, minced

2 Tsp mustard seeds (if you are hesitating, put them in anyways)

1/2 a teaspoon of cinnamon and ground cloves
I would cut down the cloves a little if you dont like your chutneys extra strong!

Ok, so it all goes into a pot
 and it cooks...


and cooks
until it is thick and saucy looking.
and when it wasn't thickening, I added a nice grainy cooking apple to sauce and thicken it up


In the meantime, you will need to wash your 250 ml jars, put them on a cookie sheet and put them in a COLD oven. Then turn the oven on to 350, no higher or the jars might crack while you fill them hot. It's like I have learned all of these things the Stephanie Way before (read: the hard way)


 I decided that my chutney needed closer to 2 hours of cooking to chutney-fy instead of one. You and I may differ on what chutney should look and taste like. I also left the skins on my pears, because I like my preserves THICK, and not sloshing around in the jar looking messy. If you are new to this skins = pectin and texture. I wanted it to be more like a compote than a sweet, runny mango chutney.


Cold Jars:


Hot Jars:


Yes, and that large canning pot you conveniently keep at hand like I do? Fill 'er up 2/3 of the way and bring it to a boil - if you've done this before you know it takes a while to get to a roll. Make sure to salt the water, raise the temperature


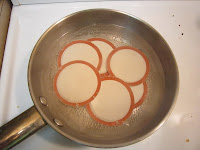
I threw the seals in a pan to soften. Take the jars out of the oven about 2 minutes before filling them. Don't fill when they are sizzling hot - I learned that this is only okay for high risk foods and not for anything with a sugar structure you need intact like jelly or jam or sauce.


Down to a science:

Fill

Lift and Lid

Tighten bands

Process 20 minutes in hard boiling canner

Remove into wire rack

Cool

Listen (to your seals 'taking', and the nice loud POP!)

Show it off, or stuff it in a stocking.

Delicious with an antipasto plate, pork dishes, or on a piece of toast with a hard sharp cheese. Such a cool unique taste!

*this is not an official canning guide, if you are not familiar with the process please read a good book like Bernardin's guide to canning where you can learn all about pH levels and botulism!*

Saturday, November 12, 2011

Revamping..

Okay so I might not be trying a "new" food every day, because that was just getting too expensive, and difficult. I guess I am an adventurous eater already! So I am trying a new format and I have a couple of posts almost ready to roll out.

To come:

some of the crazy preserves I have been making

DIY projects such as sauerkraut


See you and your tastebuds soon!


xo! Steph